We will now creat the door to link rm001 to rm002. Doors are very similar to props. Infact, like actors, they too are derrived from the Prop class.
Before setting up the door, we will need to add a view for it. To save time, instead of drawing it yourself, you can import one.
|
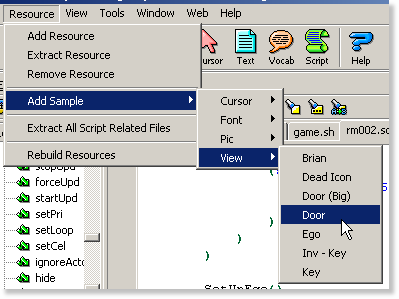
Click on the main menu's "Resource"->"Add Sample"->"View"->"Door". When the "Add Resource" dialog pops up, save it as view number 2. |
 |
Next, click on the script folder and the list of scripts in your game will appear on the right, along with a preview of the first script. |
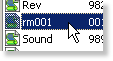 |
Scroll down the list until you see the "rm001" script. Double click on it, and the script editor will open up with the script. |
Now that the view has been added, we can set up the door. In rm001.sc, scroll down to the end of the file. There is where we'll add the door instance.
Add the following lines of code:Code:(instance aDoor of Door
(properties
y 100
x 195
view 2
entranceTo 2
locked TRUE
)
)This creates the door with view.002 (the door view) as it's view, and positions it at 195,100. The entranceTo 2 means that when the ego goes through it, it will go to rm002. The locked property is set to TRUE because we want the ego to only be able to open it if it has the key. Next, we will add the code to initialize it.
Go to the end of the rm001 instance's init() method.
Add the following line of code:Code:(aDoor:init())This calls the door's init() method setting it up and making it visible.You can see now just how easy making SCI games is! The props, actors and doors all are essentially set up the same way.
 |
Click the "Compile and Run" button and you will see the door is now part of your game! |
To allow the player to open and close the door, we will add a Said handler.
Scroll down the RoomScript instance's handleEvent method and add the following line of code:Code:(if(Said("open/door'))
(if(send gEgo:has(INV_KEY))
(aDoor:locked(FALSE))
)(else
(aDoor:locked(TRUE))
)
(aDoor:open())
)
(if(Said("close/door'))
(aDoor:close())
)First, this checks if the player typed "open door". If they did, it checks if they have the key. If they have the key, it set's the door's locked property to FALSE, otherwise, it sets it to TRUE. Finally, it calls the door's open() method. If the ego is close enough and the door is unlocked, it will open the door. Otherwise, it will display the appropriate message.
Second, it checks it the player typed "close door". If they did, it calls the door's close() method. If the ego is close enough and the door is open, it will close the door. Otherwise, it will display the appropriate message.
Finally, we'll need to set it up so when ego enters the room coming back from room 2, it is positioned at the doorway. Scroll up to the rm001 init() method.
Adjust the gPreviousRoomNumber switch to the following:Code:(switch(gPreviousRoomNumber)
(case 2
(send gEgo:
posn(195 110)
loop(2)
)
)
)
The ego is positioned just below the door when entering, and the loop is set to 2, so it is facing forward.
|
Click the "Compile and Run" button and you will see the door is now fully functional! |
To test out the door, pick up the key, then go close to it and type "open door". you can now go to the second room!
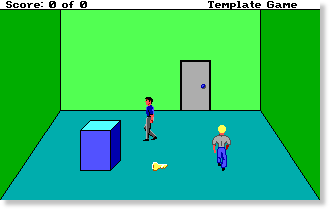
Your game will now look something like this:
To have multiple doors, you just need to change their doorCtrl, roomCtrl, and doorBlock controls.The default doorCtrl is color #1 (navy blue), roomCtrl is color #2 (green), and doorBlock color is #14 (yellow).
That sums up the basics of creating, using and interacting with doors. In the next chapter, you will learn about working with the player's score!
< Previous: Chapter 20 - Making An Additional Room Next: Chapter 22 - Handling The Player's Score >Top
You can help keep The Sierra Help Pages and its affiliates alive by helping to defray some of the costs of hosting this site. If it has been of help to you, please consider contributing to help keep it online.Thank you.
The Sierra Help Pages | Sierra Game Help | Walkthroughs | Hints, Tips & Spoilers | Utilities | Links | SHP Forums | Search
© 2013 to present The Sierra Help Pages. All rights reserved. All Sierra games, artwork and music © Sierra.