Chapter 12 - Creating the Room 1 Script
All right, so now we have all of the views, all of the texts, and the heart of the point and click menu written, it is time to actually fire it up and place it in a room. This Chapter is here really
to serve as an example of how to init, or use the menu in an actual room. This is pretty much the bare minimum. If you don't understand how this works, may I suggest that you check out Troflip's
advanced tutorials, specifically Locales and Regions.

(include "sci.sh")(include "game.sh") (script 1)
(use "controls")(use "cycle")(use "feature")(use "game")(use "main")(use "obj")
(instance public rm001 of Rm
(properties picture scriptNumber)
(method (init)
(super:init())
(self:setScript(RoomScript))
(self:setRegions(950))
(switch(gPreviousRoomNumber)
(case 500 (send gEgo:view((send gEgo:view))
loop((send gEgo:loop))
posn((send gEgo:x) (send gEgo:y)))
)
(default (send gEgo:posn(150 130)loop(1)))
)
SetUpEgo()
(send gEgo:init())
)
)
(instance RoomScript of Script
(properties)
(method (handleEvent pEvent)
(super:handleEvent(pEvent))
(if(==(send pEvent:type())evMOUSEBUTTON)
(if(not(& (send pEvent:modifiers) emRIGHT_BUTTON))
)
)
)
)
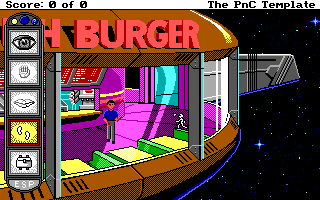
There it is, the Room 1 Script! All ready and waiting to be point and clicked upon!
< Previous: Chapter 11 - Creating the Point and Click Script Next: Chapter 13 -
Examples of Scripting Point and Click Responses >
You can help keep The Sierra Help Pages and its affiliates alive by helping to defray some of the costs of hosting this site. If it has been of help
to you, please consider contributing to help keep it online.
Thank you.
Top
The Sierra Help Pages | Sierra Game Help | Walkthroughs
| Hints, Tips & Spoilers | Utilities | Links
| SHP Forums | Search
© 2013 to present The Sierra Help Pages. All rights reserved. All Sierra games, artwork and music © Sierra.
